4 Steps to setup Statement Automation with QuickBooks Online/Desktop
Steps to setup Statement Automation with QuickBooks Online/Desktop
You can find detailed steps here with video – link
Step 1 : Signup to PayorCRM
For QuickBooks Online – Go to the login page and click on the sign up with QuickBooks Online button
For QuickBooks Desktop – Go to the login page and register an account. Download the QuickBooks connector file ( QWC file ) from settings view and add the same to your QB Desktop product
You can find detailed steps here – https://help.payorcrm.com/connecting-to-qb-desktoponline/quickbooks-desktop
Step 2 : Go to invoice reminders – > Email template
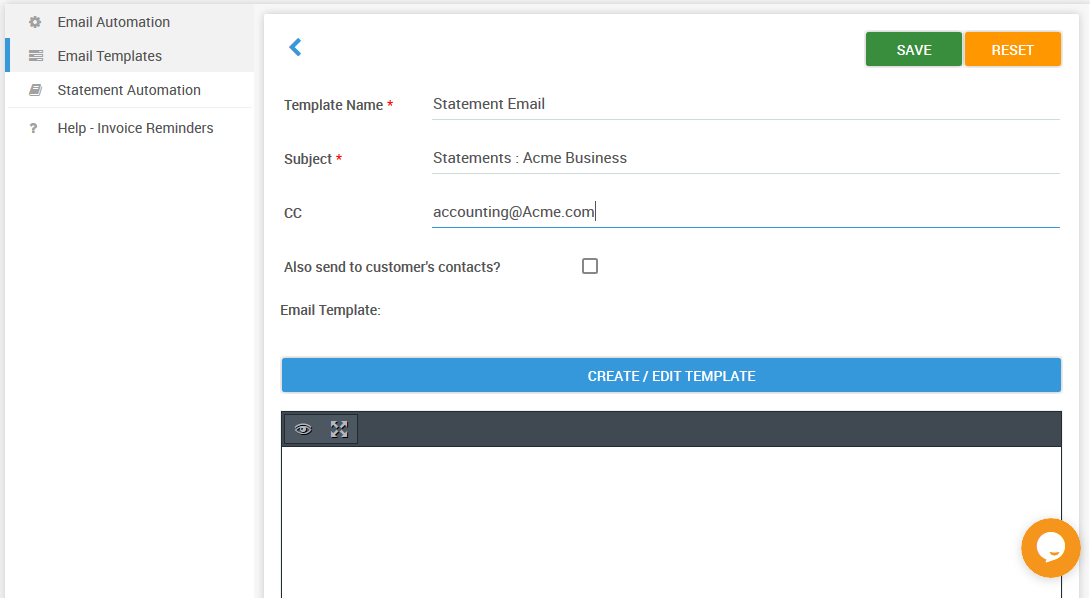
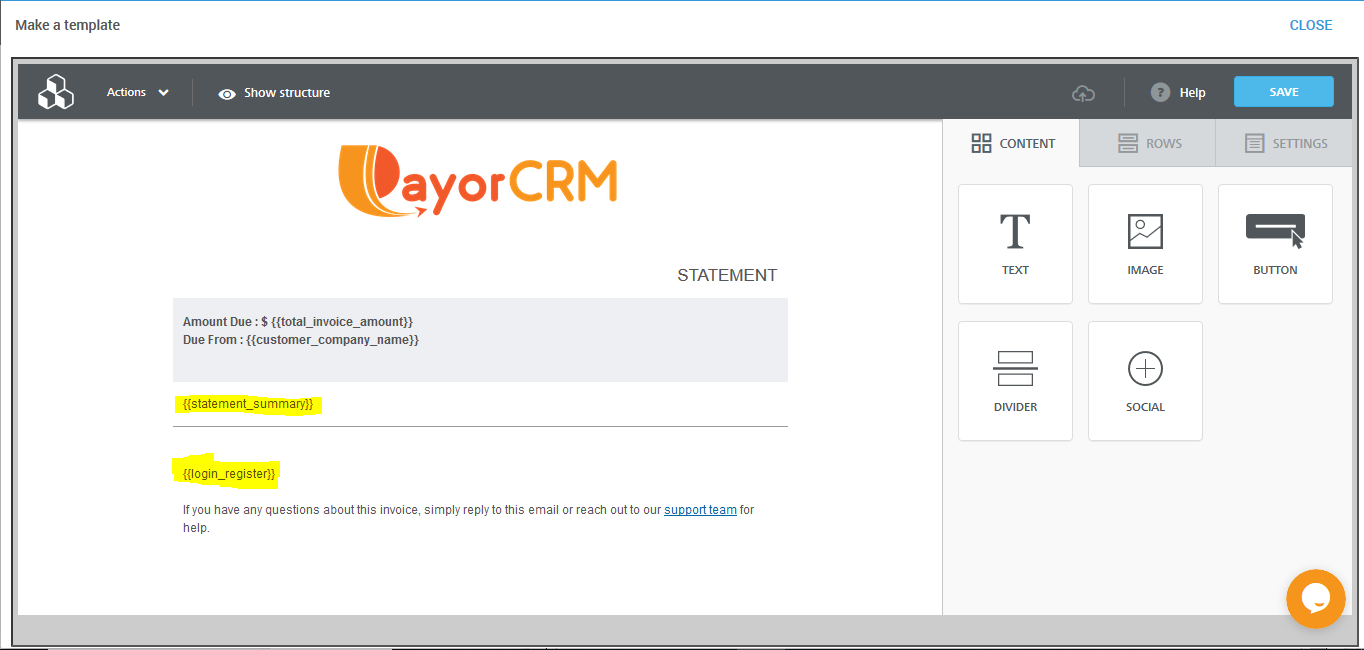
Step 3 : Create/Edit Template
Tip : Ensure that you add the merge tags {{login_register}} to ensure that the customer can login to the customer portal to see and pay their invoices using login & register button within email.
Click on this link to see what customers can do using the customer portal
Ensure that you save the template with a proper template name
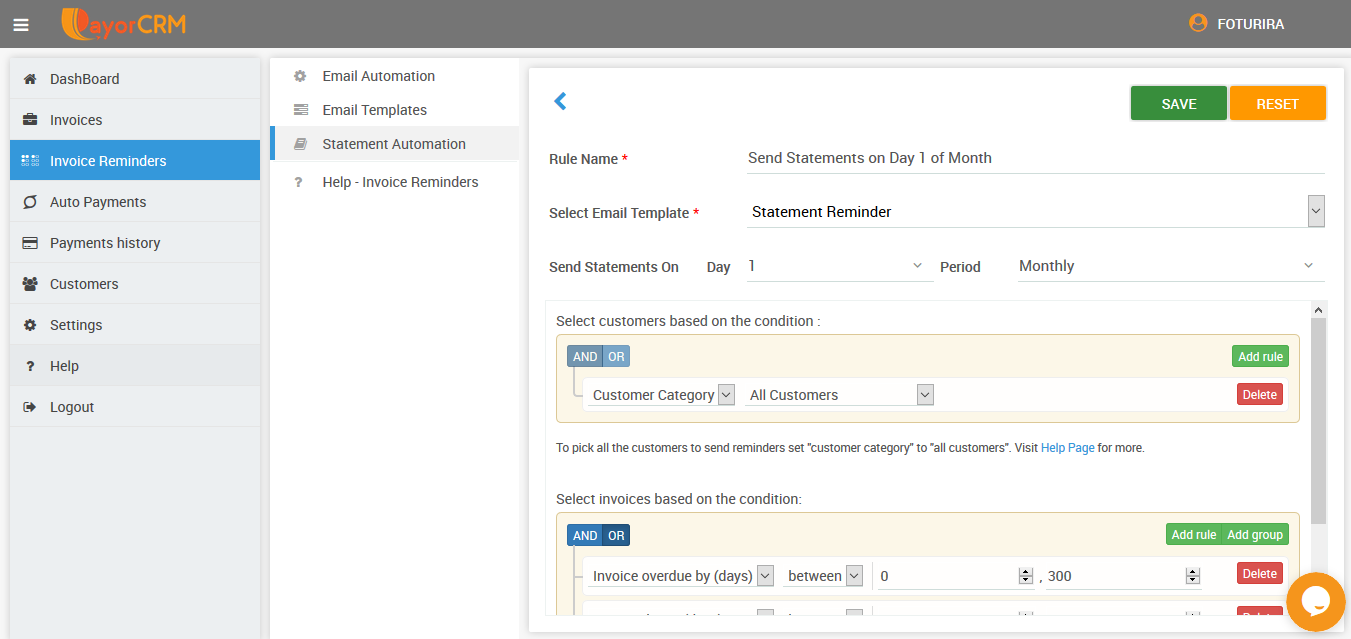
Step 3 : Go to invoice reminders – > Statement automation
Add a statement automation rule with the following rules
- Customer rule – Customer categories = All customers
- Invoice rule – Invoice Overdue between 0 – 300 days ( Ensures that all invoices that are overdue from the last 300 days are available in the statement )
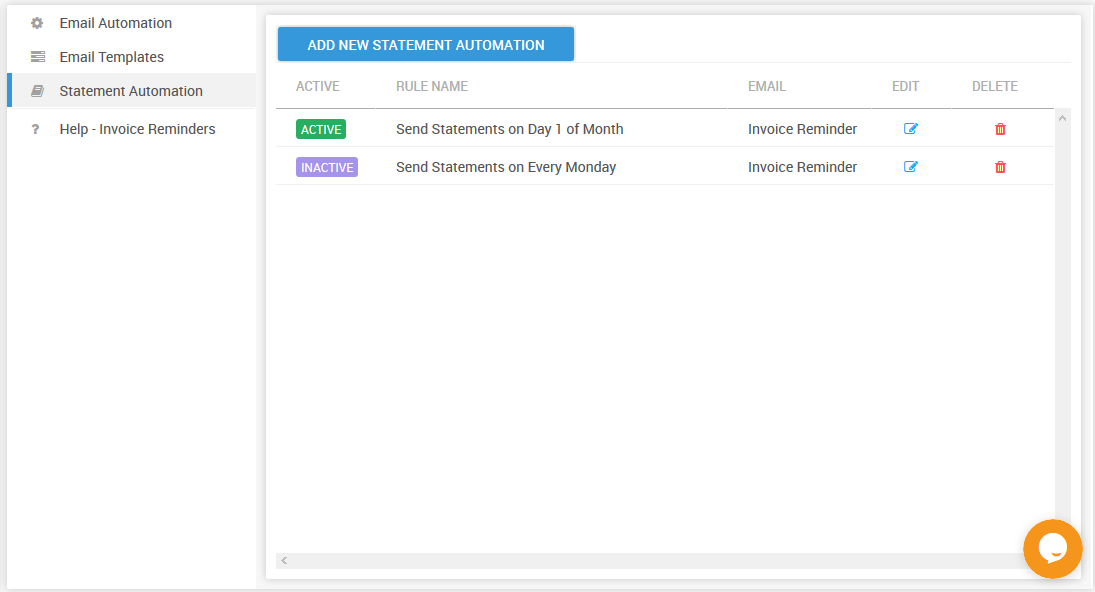
Step 4 : Ensure that the required Statement automation rule is active
Also published on Medium.